My Process
“Every artist was first an amateur.”
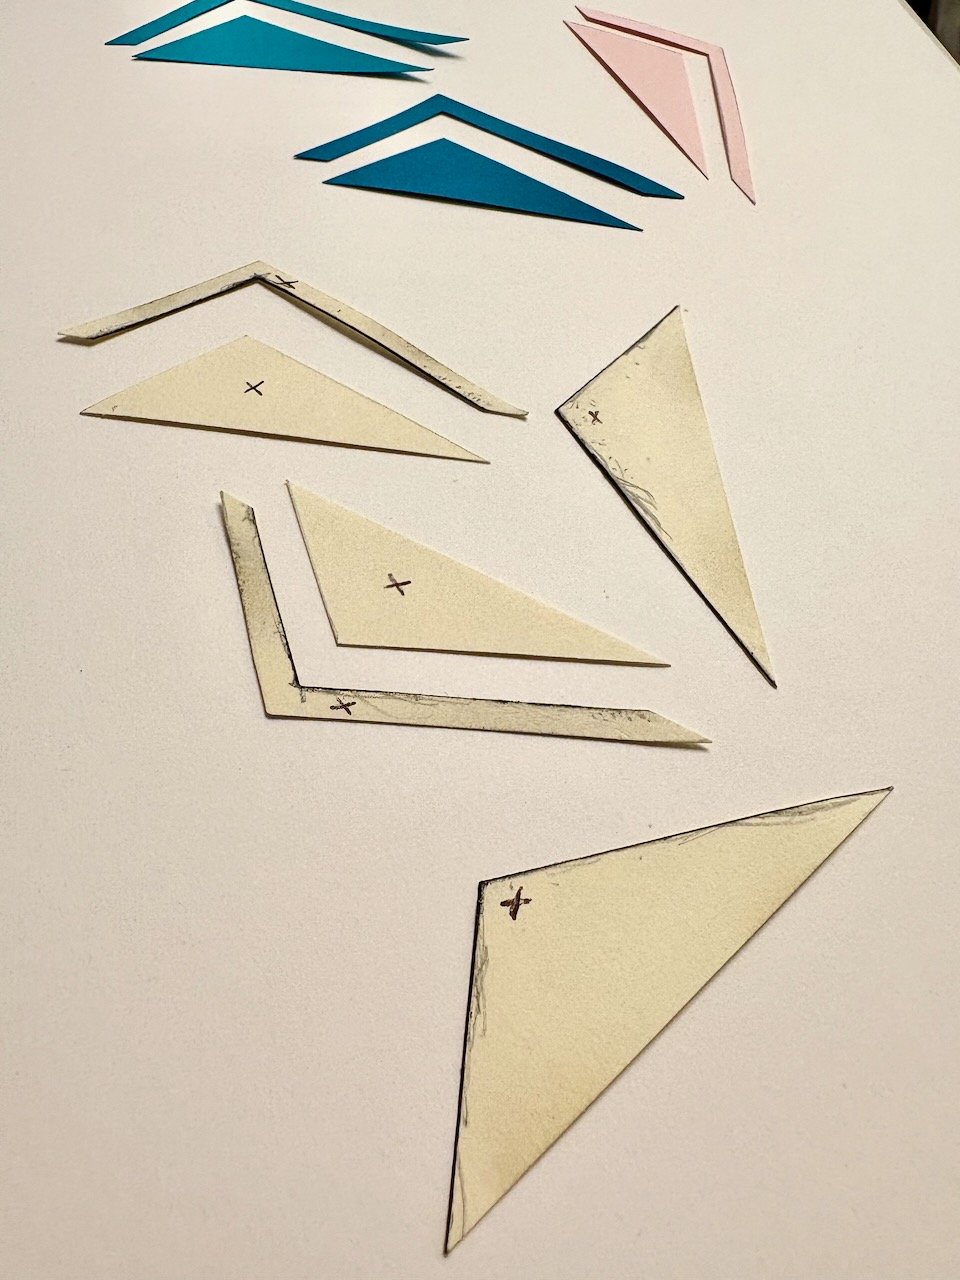
My artistic process has evolved considerably over the years. Initially, it was quite rudimentary. I would sketch shapes in a sketchbook to ensure their coherence, and then create a paper template to trace the shapes needed for the final piece. This process was time-consuming, often taking hours or days before a new artwork could even begin. The repetitive tracing led to inconsistencies in the paper shapes, which taught me valuable lessons about precision and letting go of perfection. During this time, I was quite the perfectionist, and it was a significant learning experience to allow a piece to evolve rather than forcing it to match my exact vision.
While I look back on those early days with some nostalgia, I am happy that my process has evolved to what it is today.
Now, I have a pretty regimented process: ideating, sketching and design validation, coloring, rendering, printing, painting (if needed), cutting, and gluing.
I use Adobe Illustrator to sketch and validate my ideas. My digital sketchbook contains hundreds of designs in many different stages. I experiment until I'm satisfied with the pattern's look and feel, noting what I like and dislike about different repeats, reflections, and placements of shapes. Sometimes I get the exact pattern I want on the first try, and other times I know there is potential but it still doesn't feel resolved.
Once I settle on a pattern, I determine the final dimensions, considering scale and spacing for both the desired outcome and practical creation. I then create a size-accurate version of the pattern that I will use in the printing process and as reference for the final piece.


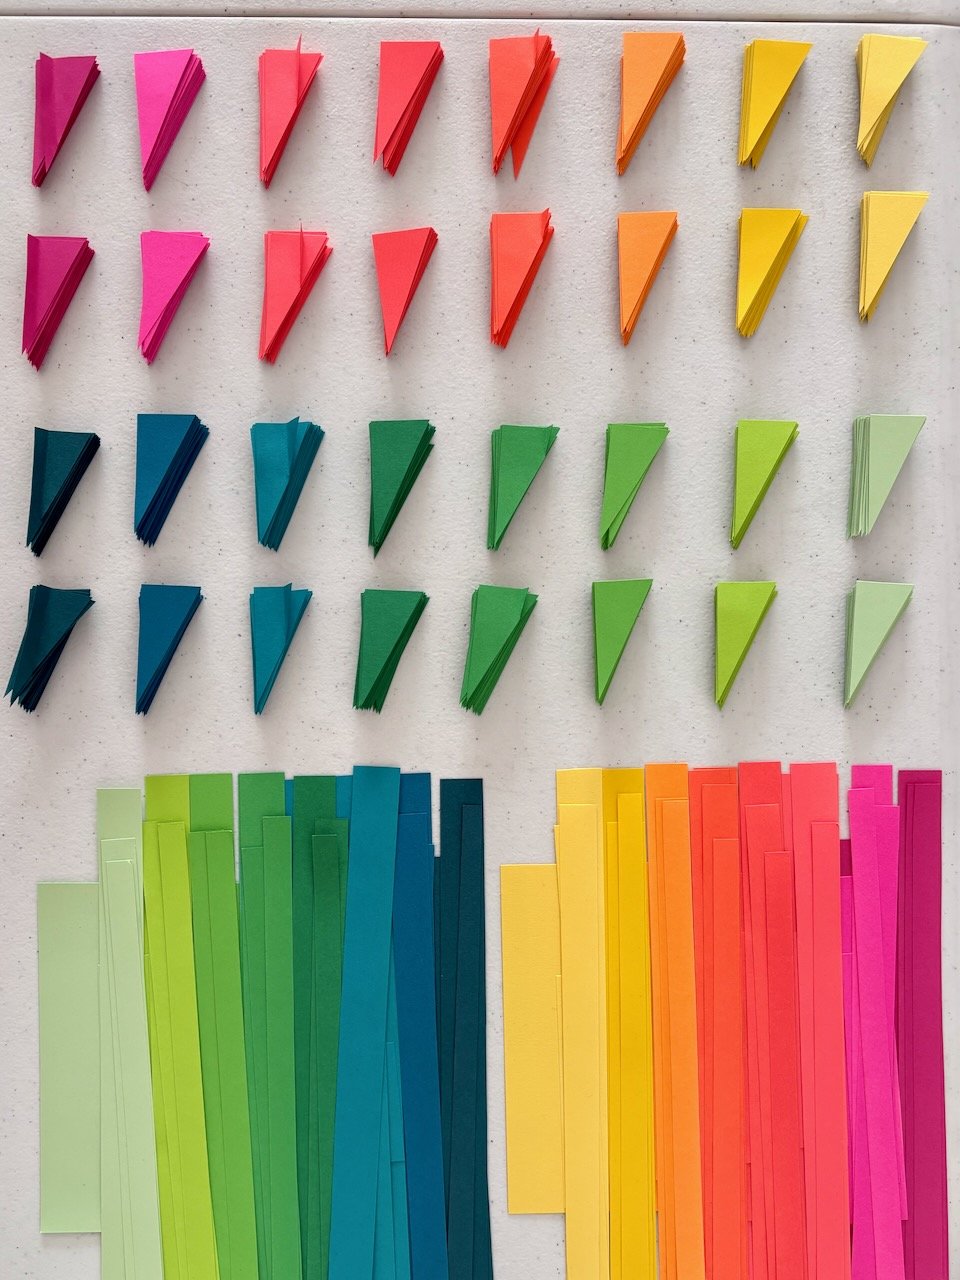
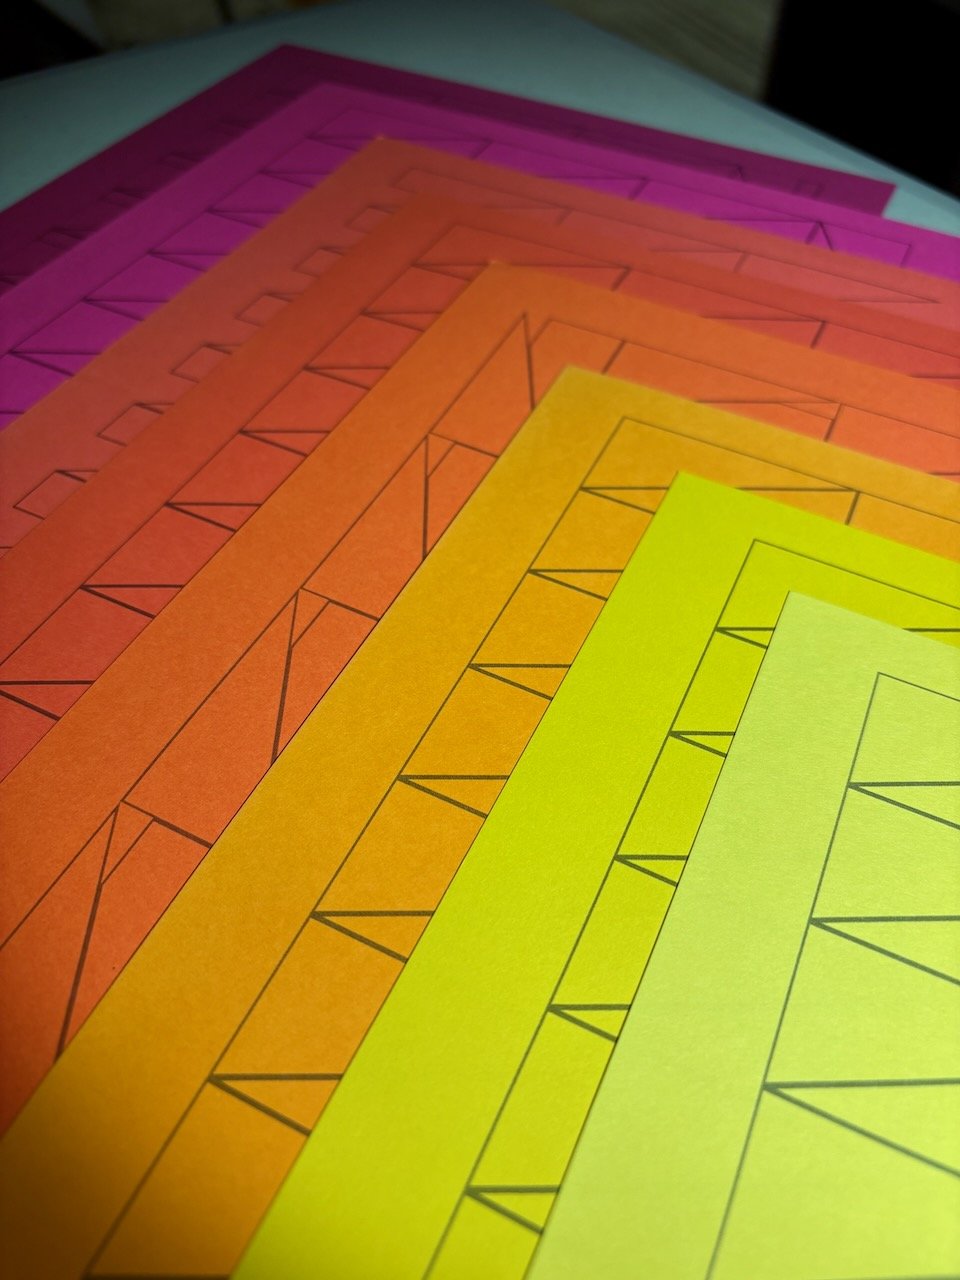
I usually have a color scheme in mind or select from my collection of pre-existing schemes. I always reference the cardstock that I have on hand before picking any kind of color scheme to make sure that it is possible. Because I use premade cardstock, I am limited to the colors that are available by the brands that I prefer. In Illustrator, I apply the closest matching tones to my digital design, experimenting with different color placements (reflecting, horizontal, skipping colors, etc.) to explore how color can create interesting repeats on the final piece. Sometimes, the right color repeat comes quickly and other times I will make a dozen or more versions to see which one suits the piece most.
With the piece colored to my satisfaction, I begin work on the final digital piece. I make a rudimentary background gradient to help understand how it will interplay with the patterns for canvas pieces and play around with a lot of different colors for my paper on paper work. I then create two versions: one true to size and one that accounts for any wrapping of pieces over the edges. If I am working with paper on paper, I only make the first version, but when working on canvas, I need both versions to account for how much of the pattern will overlap.
A major upgrade I’ve made over time is printing shapes directly onto cardstock, which improves efficiency and allows for more practice. I meticulously count the required pieces for each pattern element and color, adding a buffer for errors. I arrange the elements to minimize waste and maximize the output of each sheet of paper.
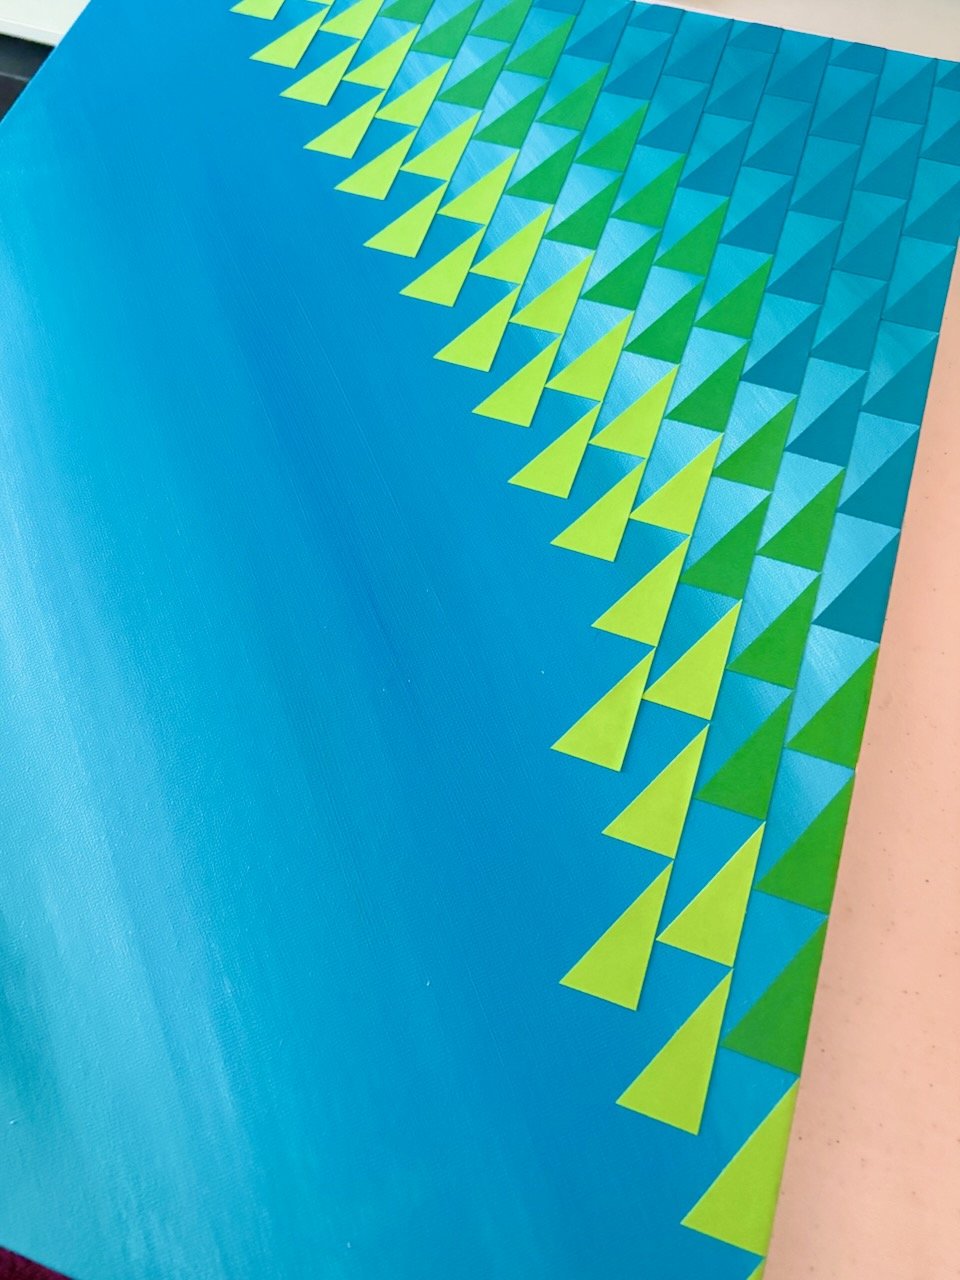
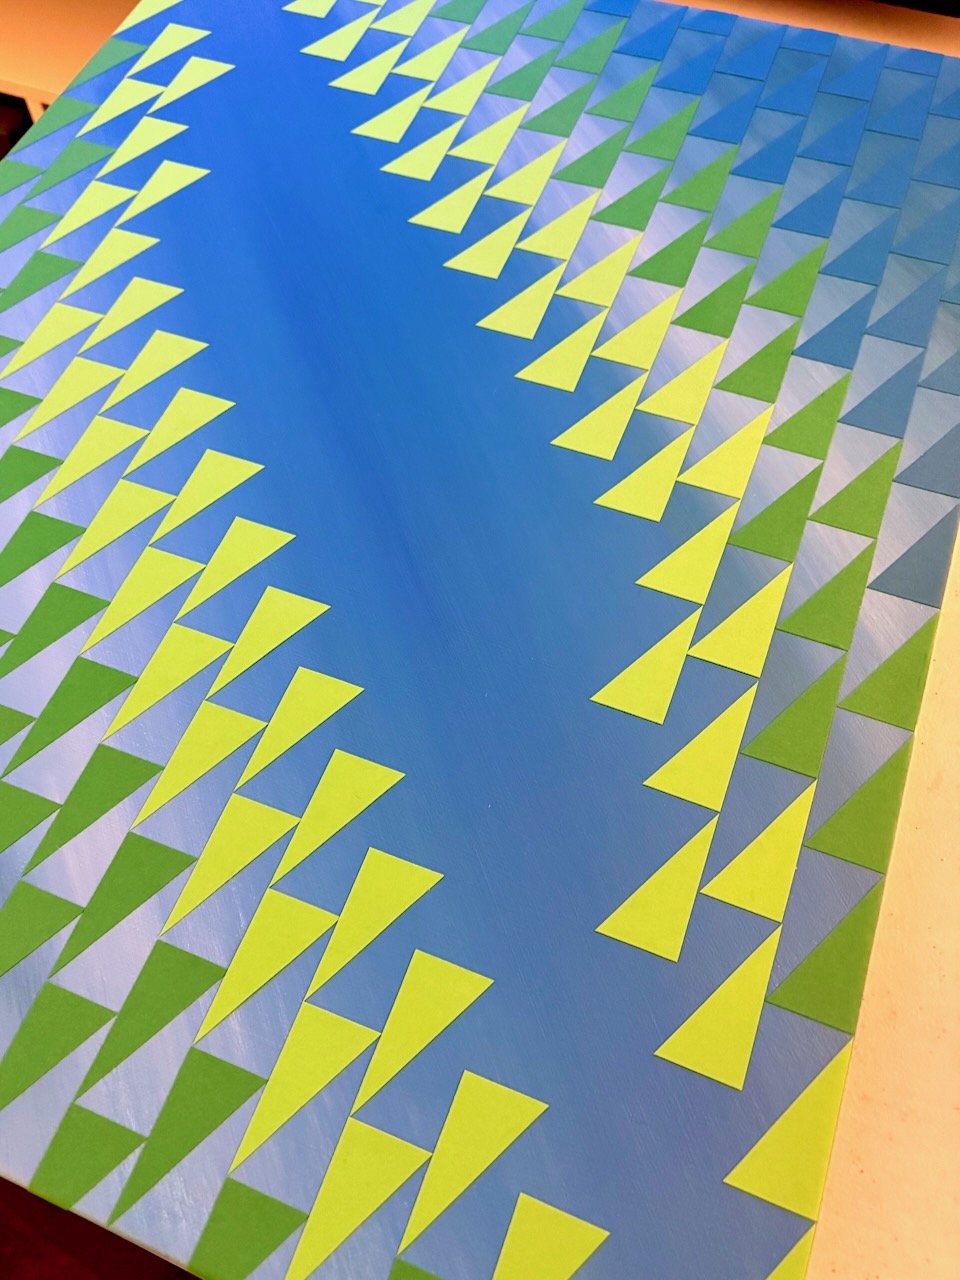
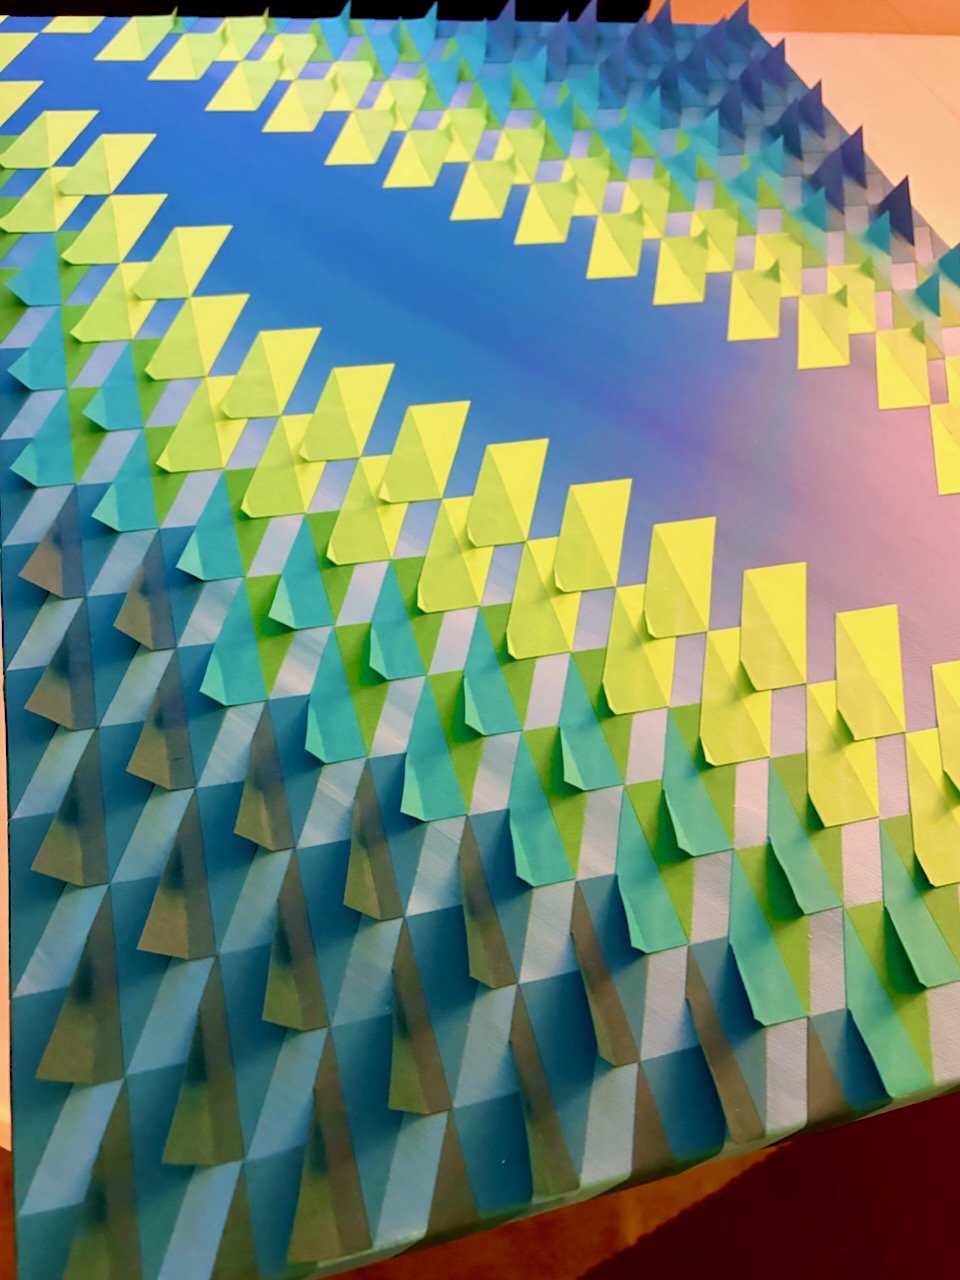
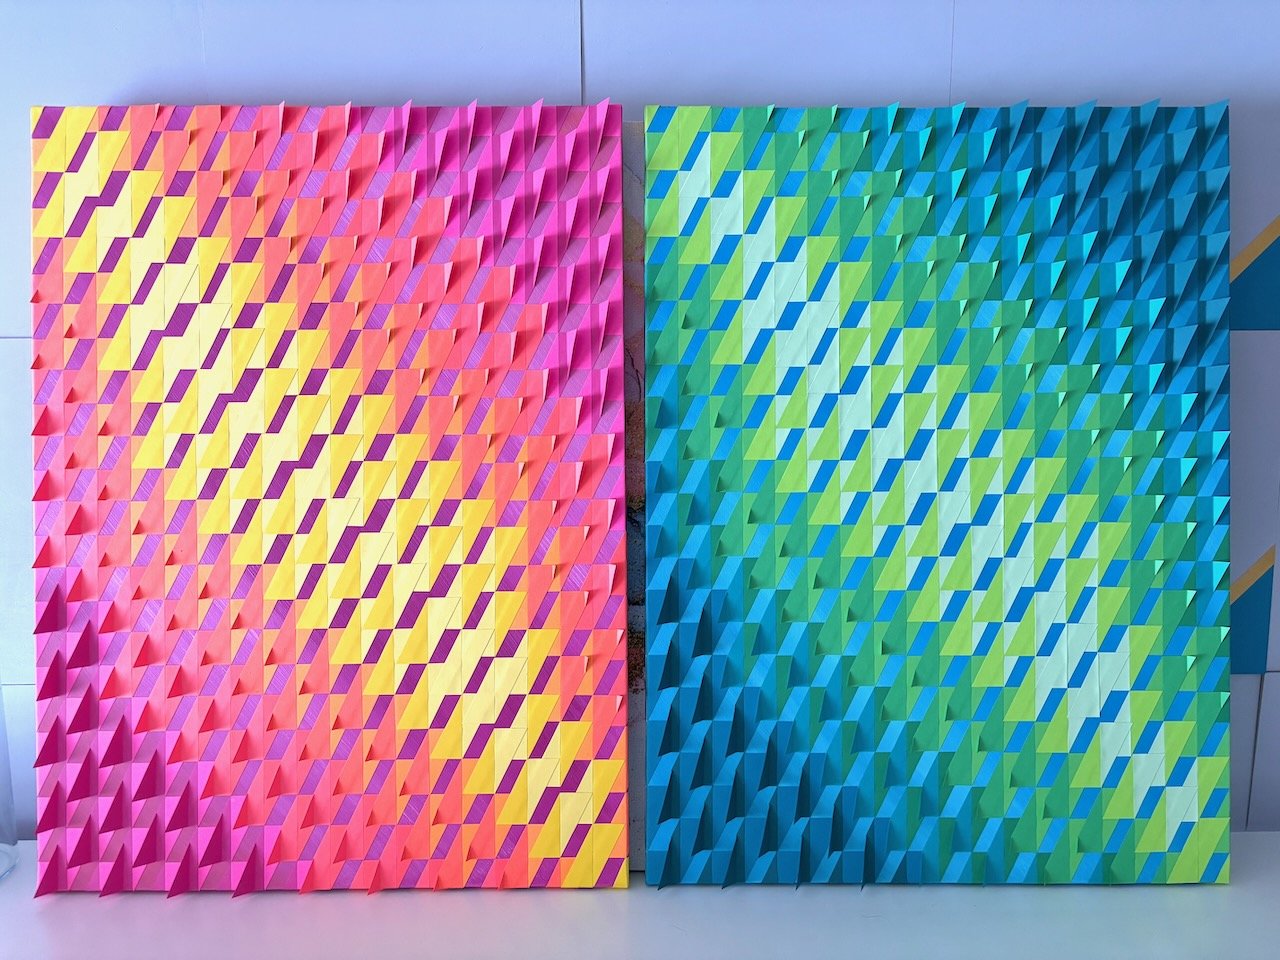
If I’m using canvas as the base, I enjoy the freedom to experiment with painting abstract styles and typically work on feeling rather than with any specific plan. I add multiple colors at a time and streak them together, adding more as needed. I like the free feeling that comes with allowing the canvas to become what it wants to be. A signature element in my paper on canvas work is that the background tone will match some of the foreground pieces, causing them to almost disappear. This is the only real consideration I take into account when painting. Typically, my process yields some kind of gradient or abstract, streaky color mixture. I don't focus on creating any specific details on the canvas as most of it gets covered up by the paper pattern.
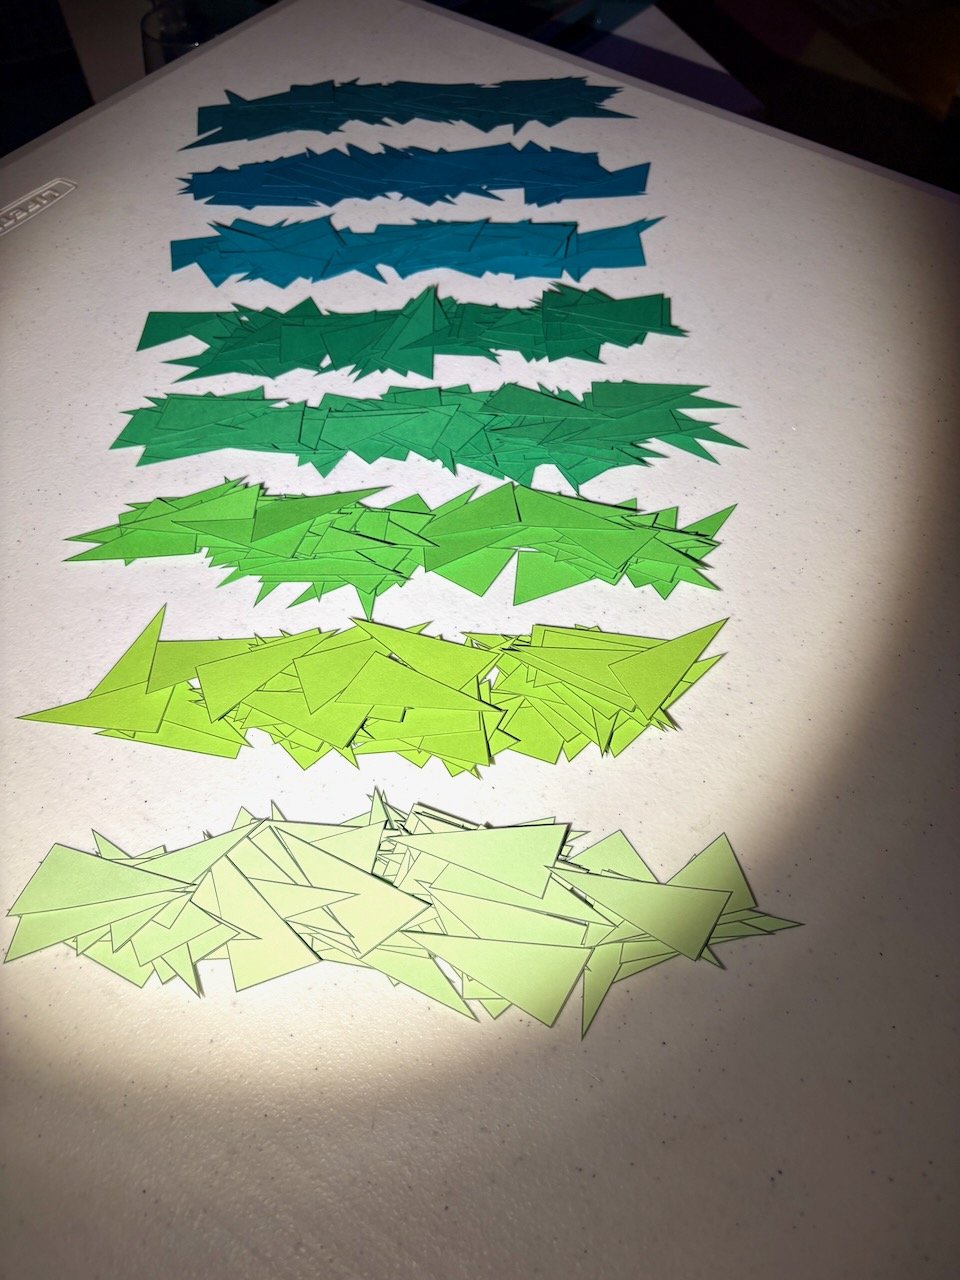
I often cut the paper shapes while the painted canvas dries to optimize the time spent on a piece. I strive for precise cuts to minimize variation between pieces, a challenge because I cut everything by hand. The beginning of this phase can be quite slow as I figure out the best rhythm for cutting out the shapes. I've found that each printed page has an optimal cutting strategy. The first few cuts are really me sorting out how to do this. Once in a groove, things move faster. I stay extremely organized during this part of the process in order to sort and store all of the pieces to facilitate the creation process. This labor intensive process can take hours or days to complete thousands of cuts, often leaving me with indentations on my hands from the scissors. Despite this labor, I find it wildly calming and enjoy the repetitive nature of the task.
The last step is to adhere the pieces to the canvas or background. Each piece has a natural way it wants to be glued, dictated by shape overlaps or other factors. I carefully position each piece, frequently checking the alignment from various perspectives. Imperfections are inevitable but tend to disappear into the overall composition.
After a final clean-up, the artwork is photographed and prepared to find its new home.